Filter Image View Using jQuery
 14 years ago
  22128
22128  3700
3700
 n/a
n/a

the image items are showing and hiding with horizontal slide effect based on user choice. Horizontal slide effect produced by manipulating item’s width, when hiding the item we will change the item width into 0 pixel, and when showing the item we will return its default width.
To make the item’s width transformation smooth we will also change its opacity, for hiding the item set the opacity from 100% to 0% and vice versa for showing them. We can show and hide the item but we won’t see the slide effect transition, so we must use built-in jQuery function, animate().
Setup The Item’s View
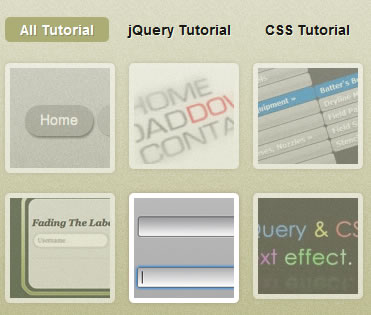
We’ll create two separated section, first the navigation and the last is the items list. The navigation will contains anchor links which will navigate the items visibility, while items list will contains image item which will be show and hide.
Now, create navigation and items list like following script :
<ul class="menu">
 <li class="selected"><a rel="all" href="#">All Tutorial</a></li>
 <li><a rel="jquery" href="#">jQuery Tutorial</a></li>
 <li><a rel="css" href="#">CSS Tutorial</a></li>
 <li><a rel="psd" href="#">Free PSD</a></li>
</ul>
<ul class="item">
 <li><img src="images/button.jpg" alt="" /></li>
 <li><img src="images/codesnippet.jpg" alt="" /></li>
 <li><img src="images/css.jpg" alt="" /></li>
 <li><img src="images/css2.jpg" alt="" /></li>
 <li><img src="images/psd.jpg" alt="" /></li>
 <li><img src="images/groovershark.png" alt="" /></li>
 <li><img src="images/stylize.jpg" alt="" /></li>
 <li><img src="images/psd2.jpg" alt="" /></li>
</ul>
As you mention above, each navigation and item has rel attribute that represent each category. The purpose is when user choosing one of the navigation, the items that will be displayed only an item which has same rel attribute with the navigation, the others will be hidden.
We will styling the navigation first, set the list display with inline-block so the unordered list will be displayed horizontally. If the user select one of the navigation, we will add “selected” class name to them. “selected” style are having green background with box-shadow and border radisu, so the selected navigation will have different style with the siblings.
ul.menu {
 margin-left: .5em;
 margin-bottom: 1em;
}

ul.menu li {
 list-style-type: none;
 display: inline-block;
 font-weight: bold;
 text-shadow: 1px 1px 0px #f3f5da;
 padding: 2px 15px;
}

 .selected {
  -webkit-border-radius: 15px;
  -moz-border-radius: 5px;
  border-radius: 5px;
  background: #acac75;
  -webkit-box-shadow: 1px 1px 0px #8c8c5d;
 }

 .selected a, .selected a:visited {
  text-shadow: 1px 1px 0px #8c8c60;
  color: #fff;
 }
Now styling the image items, set each item display with block, list style type with none, float with left and margin with 0.5 em. Each image inside the list will have 5pixels white border thickness, border radius 5 pixels and also box shadow.
ul.item li {
 list-style-type: none;
 display: block;
 float: left;
 margin: .5em;
}

 ul.item li img {
  border: 5px solid #fff;
  -webkit-border-radius: 5px;
  -moz-border-radius: 5px;
  border-radius: 5px;
  -webkit-box-shadow: 0px 0px 5px #ac987e;
  -moz-box-shadow: 0px 0px 5px #ac987e;
  box-shadow: 0px 0px 5px #ac987e;
 }
Slide Effect With animate()
The slide effect will fire up when user click the navigation, so we will add click event to them. After that, remove “selected” class name from all navigation and add it to selected navigation. This will make selected navigation will have different style with its siblings.
$('.menu li a').click(function() {
 $('.menu li').removeClass('selected');
 $(this).parent('li').addClass('selected');
Next, get its rel attribute value and check it. If the value is “all” (which mean showing all image item) we will display all image item and if the value is other we will search any image item that has same rel attribute value and display it then hide the others.
thisItem  = $(this).attr('rel');

if(thisItem != "all") {

 $('.item li[rel='+thisItem+']').stop()
 .animate({'width' : '110px',
     'opacity' : 1,
     'marginRight' : '.5em',
     'marginLeft' : '.5em'
    });

 $('.item li[rel!='+thisItem+']').stop()
 .animate({'width' : 0,
     'opacity' : 0,
     'marginRight' : 0,
     'marginLeft' : 0
    });
} else {

 $('.item li').stop()
 .animate({'opacity' : 1,
    'width' : '110px',
    'marginRight' : '.5em',
    'marginLeft' : '.5em'
   });
}
})
As you can see above, for displaying the item we search all item which having same rel attribute value with the selected navigation. Then we start the animation which will animate the item width to the image’s width, set its opacity to 100% and set each margin left and right to 0.5em. To prevent animation queue, we use stop() function before animate() function.
For hiding the sibling we use the same technique as above except the animation properties’s value, set each animation properties’s value to 0.
At this point our item will be show and hide using slide effect, triggered by the navigation. The last thing we will do is to make the image items smoother by adjusting its opacity. Set each image opacity to 50% using animation and hover toggle event, if the user hovering it, animate its opacity to 100% and revert it value to 50% when user hovering out.
$('.item li img').animate({'opacity' : 0.5}).hover(function() {
 $(this).animate({'opacity' : 1});
}, function() {
 $(this).animate({'opacity' : 0.5});
});
Ok, that’s. It thanks for reading and hope this post useful
You might also like
Tags
accordion accordion menu animation navigation animation navigation menu carousel checkbox inputs css3 css3 menu css3 navigation date picker dialog drag drop drop down menu drop down navigation menu elastic navigation form form validation gallery glide navigation horizontal navigation menu hover effect image gallery image hover image lightbox image scroller image slideshow multi-level navigation menus rating select dependent select list slide image slider menu stylish form table tabs text effect text scroller tooltips tree menu vertical navigation menu

 Subscribe
 Follow Us


