jQuery Mouse Events
HTML
For us to make a tooltip we’re going to have some links to work with, and a container for our tooltip. There is nothing too special here. I placed the links in a header tag just to make the links a bit easier to see.
Here is the HTML:
<!DOCTYPE html PUBLIC "-//W3C//DTD XHTML 1.0 Strict//EN"
    "http://www.w3.org/TR/xhtml1/DTD/xhtml1-strict.dtd">
<html>
    <head>
        <meta http-equiv="Content-type" content="text/html; charset=utf-8" />
        <title>Mouse Events</title>
    </head>
    <body>
        <!-- Center Links-->
        <div id="wrapper">

            <!-- Links -->
            <h1 id="link">
                <a href="#">Empty Link</a><br /><br />
                 <a href="http://www.google.com">Link to Google</a>
            </h1>

            <!-- Tooltip Container-->
            <span id="toolTip"></span>
        </div>
    </body>
</html>
CSS
The only thing that we really need to do here is make sure the tooltip is initially hidden, and give the tooltip a position of absolute so it can freely move around the page. All of the other CSS is purely for aesthetics.
Here is the CSS:
/* Make everything Beautiful */
body{
    background-color: #111;
    color: #ddd;
    font-family: Arial, "MS Trebuchet", sans-serif;
}

a{
    color:#777;
}


/* Center Links */
#wrapper{
    width:600px;
    margin:0 auto;
    padding-top:100px;
    text-align: center;
}

/* Make sure tooltip is initially hidden,
   and can move around freely */
#toolTip{
    padding:5px;
    background-color: #577FAF;
    display:none;
    position:absolute;
}
How Events Work
If you’ve never used events before you might be wondering how they work. They really aren’t that difficult. If you think of them like events in real life they’re a little easier to understand. For example, you set your alarm clock to go off at 6am. This is an event, it’s going to let you know when this event happens. Then it’s your choice to do what ever you want at that time…hit the snooze button or throw the alarm clock across the room.
In terms of jQuery, we might set up an event for when a mouse button is clicked. jQuery will then run the function we assign to that event auto magically. This function is generally referred to as the event Handler.
In jQuery there are a couple of ways to create an mouse event.
- $(‘#selector’).eventName( [function to call])
- $(‘#selector’).bind(“eventName”, [function to call]);
Where [function to call] is the function that will be called when the event is triggered, and eventName is the event you want to call (“click” or “mousemove”).
Building the Tooltip
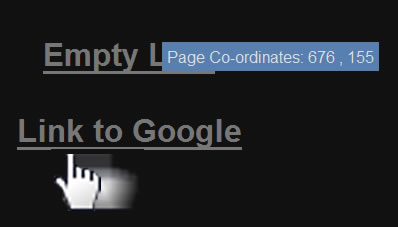
The first thing we’re going to handle is having the tooltip display whenever your mouse is moved over top of a link. For this we’ll be using the event “mousemove” .
The event handler for the mouse event can be passed an argument. This argument will hold an event object that holds a bunch of information that you can use. Each event might have slightly different information in their object. For example, the mousemove event has a pageX value and a pageY value. These values tell the event handler what the mouse x and y co-ordinates are. We’re going to use these co-ordinates to move our tooltip container to where the mouse is.
Here is the jQuery:
/*Once everything is loaded */
$(document).ready(function() {

    /* Offset for the tool tip so it does not sit right on the cursor */
    var offsetX = +40;
    var offsetY = -20;

    /*When the mouse is moved trigger the event */
    $('a').mousemove(function(event) {

        /*Put page coordinates in the tooltip*/
        $('#toolTip').html("Page Co-ordinates: "+ event.pageX+' , '+event.pageY);

        /*Move the tool tip to where the mouse is. */
        $('#toolTip').css({top:event.pageY + offsetY+ "px", left: event.pageX + offsetX +"px"})

        /* Display the tooltip */
        $('#toolTip').show("fast");
    });

});
On the mousemove event we simply add text to the tooltip container, adjusted the top and left CSS properties of the tooltip container, then displayed it for the world to see. You might have noticed an offset. This is so the tool tip doesn’t sit directly on top of the mouse cursor.
At this point when we roll off of the link, the tooltip is still displaying. Lets add an event for when the mouse rolls off of a link.
jQuery:
/* When the mouse is off the link hide the tooltip */
$('a').mouseout(function(){
    $('#toolTip').hide("fast");
});
We didn’t need the event object this time, simply because we didn’t need any information that it offers. All we did was hide the tooltip when the mouseout event is triggered.
Click Event
Now we’re going to tackle the click event. The idea behind this is we’re going to give each link an index. When the user clicks on each link it will display the index. Since they’re links, the default action is to take you somewhere else. We’re going to have to prevent this from happening, then do what we need to.
jQuery:
/* Step through each link*/
$("a").each(function(i) {
     /* i contains a count - 1st link = 0, 2nd link = 1, etc.*/

     /*Bind click event, {index:i} can be retrieved by event object inside event handler */
    $(this).bind("click",{index:i},function(event){

        /* Prevents the link from taking us off the page. */
        event.preventDefault();

        /* event.data retrieves any parameters passed into the bind method.
           in this case the index. */
        $('#toolTip').html("You Click link # "+event.data.index);
    });
});
The each function gives us an id for each link. You’ll noticed we used the bind function this time. This is so we can pass an object in the argument e.g. {index:i} . This argument can then be accessed via the event object. So why go all the trouble of using an event object? Can’t you just use the i variable from the each function? In short you can’t use the i, because the i variable isn’t attached to each link. If you did use it, it would display the current value of i, which would be the last links index., even if you clicked on the first link.
You might have noticed a function that the event object had called preventDefault(). This just prevents the default action of link so we can do what we need to and not be taken elsewhere.
Conclusion
That’s it for now. There are quite a few events out there that you can play with. I recommend going to jQuery’s website and check them out. It might also be a good idea to check out all the methods and properties of the event object. I just scratched the surface with this tutorial, there is a lot more out there that can make you life easier, and your websites cooler.
<!DOCTYPE html PUBLIC "-//W3C//DTD XHTML 1.0 Strict//EN"
    "http://www.w3.org/TR/xhtml1/DTD/xhtml1-strict.dtd">
<html>
<head>
<meta http-equiv="Content-type" content="text/html; charset=utf-8" />
<title>Mouse Events</title>

<style type="text/css" media="screen">
    body{
        background-color: #111;
        color: #ddd;
        font-family: Arial, "MS Trebuchet", sans-serif;
    }
    a{
        color:#777;
    }
    #wrapper{
        width:600px;
        margin:0 auto;
        padding-top:100px;
        text-align: center;
    }
    #toolTip{
        padding:5px;
        background-color: #577FAF;
        display:none;
        position:absolute;
    }
</style>

</head>
<body>

<div id="wrapper">
<h1 id="link">
    <a href="#">Empty Link</a><br /><br />
     <a href="http://www.google.com">Link to Google</a>
</h1>
<span id="toolTip"></span>
</div>

</body>
<script src="http://ajax.googleapis.com/ajax/libs/jquery/1/jquery.min.js" type="text/javascript" charset="utf-8"></script>
<script type="text/javascript" charset="utf-8">
$(document).ready(function() {

    var offsetX = +40;
    var offsetY = -20;

    $('a').mousemove(function(event) {

        $('#toolTip').html("Page Co-ordinates: "+ event.pageX+' , '+event.pageY);
        $('#toolTip').css({top:event.pageY + offsetY+ "px", left: event.pageX + offsetX +"px"})
        $('#toolTip').show("fast");
    });

    $('a').mouseout(function(){
        $('#toolTip').hide("fast");
    });
    $("a").each(function(i) {

        $(this).bind("click",{index:i},function(event){
            event.preventDefault();

            $('#toolTip').html("You Click link # "+event.data.index);
        });
    });

});

</script>
</html>
You might also like
Tags
accordion accordion menu animation navigation animation navigation menu carousel checkbox inputs css3 css3 menu css3 navigation date picker dialog drag drop drop down menu drop down navigation menu elastic navigation form form validation gallery glide navigation horizontal navigation menu hover effect image gallery image hover image lightbox image scroller image slideshow multi-level navigation menus rating select dependent select list slide image slider menu stylish form table tabs text effect text scroller tooltips tree menu vertical navigation menu

 Subscribe
 Follow Us
 14 years ago
 13991
13991 2575
2575
