jsProgressBarHandler (Dynamic Unobtrusive Javascript Progress/Percentage Bar)
 14 years ago
  12865
12865  2398
2398
 n/a
n/a

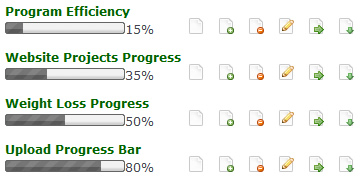
Automatic Creation of Progress Bars
Include the needed javascript in your HTML document
      <!-- jsProgressBarHandler prerequisites : prototype.js -->
          <script type="text/javascript" src="js/prototype/prototype.js"></script>

          <!-- jsProgressBarHandler core -->

          <script type="text/javascript" src="js/bramus/jsProgressBarHandler.js"></script>
The elements you want to change with a dynamic progressBar must be scripted as this:
<span class="progressBar" id="myElementId">15%</span>
-
- Yes, it must be a
spanelement progressBaris the className that will triggerjsProgressBarHandlerto change it with a progress bar- the id (
myElementIdin the example) must be unique (as per HTML specification) and is required forjsProgressBarHandlerto work properly - the innerHTML of the element must be the percentage (either with or without the &proc; character)
- Yes, it must be a
- You might want to edit the first few lines (#28-35) of
js/bramus/jsProgressBarHandler.jsto change some settings like width, height, animation and the images to use - That's it, you're done!
Manual Creation of Progress Bars
Include the needed javascript (2 files) in your HTML document
      <!-- jsProgressBarHandler prerequisites : prototype.js -->
          <script type="text/javascript" src="js/prototype/prototype.js"></script>
          <!-- jsProgressBarHandler core -->
          <script type="text/javascript" src="js/bramus/jsProgressBarHandler.js"></script>
Create a container (viz. a regular HTML element like a paragraph or a span) in your HTML file to hold the progressbar. Make sure it has an id set.
<div class="percentImage1" id="hereComesMyFirstProgressBar">[ Loading Progress Bar ]</div>
- If you're using the default markup used (with
spanelements which hasprogressBarasclassName), then editjs/bramus/jsProgressBarHandler.jsand set the varautoHooktofalse(line #25) -
Create a new
JS_BRAMUS.jsProgressBarinstance by adding this javascript to your HTML page (the code will be executed when the DOM is done loading):
      Event.observe(window, 'load', function() {
       firstManualPB = new JS_BRAMUS.jsProgressBar($('hereComesMyFirstProgressBar'), 50, {animate: false, width: 240, height: 24});
          secondManualPB = new JS_BRAMUS.jsProgressBar($('hereComesMySecondProgressBar'), 10, {animate: true, showText: false});
    }, false);
-
- The first param is the element to create the progressbar in
- The second param is the (intial) percentage the progressbar should hold
- The third param is optional and holds a specific configuration for that instance. Parts of this object can be omitted (and parts of the default options will be used instead), or the param can even be dropped (the full default options will be used)
- You might want to edit the first few lines (#28-35) of
lib/jsProgressBarHandler.jsto change the default settings for width, height, animation and the images to use
That's it, you're done!
You might also like
Tags
accordion accordion menu animation navigation animation navigation menu carousel checkbox inputs css3 css3 menu css3 navigation date picker dialog drag drop drop down menu drop down navigation menu elastic navigation form form validation gallery glide navigation horizontal navigation menu hover effect image gallery image hover image lightbox image scroller image slideshow multi-level navigation menus rating select dependent select list slide image slider menu stylish form table tabs text effect text scroller tooltips tree menu vertical navigation menu

 Subscribe
 Follow Us


