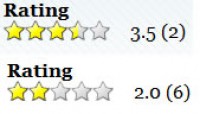
Good Rating plugin for jQuery

Project Description
Rating plugin for jQuery
Fast, Progressive enhancement, customizable (just swap out the images, or change some CSS), Unobtrusive JavaScript (using HTML5 data-* attributes), RTL support, supports as many stars as you'd like, and also any step size.
Minified size: 3.35KB (1.15 bytes when gzipped).
Tested on: IE7-9, Chrome 7, Firefox 3.6, Opera 10.63
Prerequisites
In order to use RateIt you'll need:
- jQuery 1.4.3 or newer.
- jquery.rateit.min.js, rateit.css, delete.gif, star.gif
- Place a reference to the rateit.css stylesheet into the page head.
- Place a script reference to jquery.rateit.min.js before your </body> tag.
Options
The following options can be set. See the online examples (or the one included in the download) in order to see how you can use these options.
- HTML: data-rateit-value, JS: value = initial value (default: same as min)
- HTML: data-rateit-min, JS: min = min value (default: 0).
- HTML: data-rateit-max, JS: max = max value (default: 5).
- HTML: data-rateit-step, JS: step = step size (default: 0.5)
- HTML: data-rateit-backingfld, JS: backingfld = HTML selector to the backing field (default: null)
- HTML: data-rateit-readonly, JS: readonly = whether or not is readonly (default: false)
- HTML: data-rateit-resetable, JS: resetable = when not readonly, whether to show the reset button (default: true)
- HTML: data-rateit-starwidth, JS: starwidth = width of the star picture
- HTML: data-rateit-starheight, JS: starheight = height of the star picture
You can set RateIt options in many different ways:
- HTML: on the rateit div, using the data-* attributes.
- HTML: RateIt will get the corresponding values from the backingfield (When it is input type=rating it will use min, max and step, when it is a select it will calculate them by itself, with any other type it will just get their value).
- JS: When creating a RateIt object you can add these options as an object into the first parameter ie. $('XX').rateit( { step : 1 , min : 2 } );.
- JS: When a RateIt object exists, you can get/set values in the normal jQuery way: $('XX').rateit('min') to get a value, $('XX').rateit('min',3); to set a value.
And you can mix and match. The order of importance is from high to low: Backing field, data-*, JS options, JS defaults.
Events
RateIt triggers the following events:
- rated (when a rating happened, get the rating via $(this).rateit('value'), or if you supplied a backing field, via its value)
- reset (when the reset button was clicked).
Bind to the events using
$(XXX).bind('rated', function() { alert('rating: ' + $(this).rateit('value')); });
or
$(XXX).bind('reset', function ( ) { alert('I was reset'); } );
Why is RateIt different
Although it does the same job as the rest of the jQuery star rating plugins, the main difference is its simplicity.
Most plugins create an element for each (partial) star, be it a div with a star background, or an img tag.
Each of these tags gets a hover event, and a click event. And on these hover/click events it has to go and talk to the other stars, telling them to change their state.
So each star plugin does a lot of DOM alterations (adding the number of stars as elements), and adds a lot events (again the number of stars times 2).
RateIt uses basically three divs.
One background (the inactive state), and two divs on top (the hover, and selected state). In addition it only attaches three event handlers (not counting the use of the reset button aside).
Each of these divs has a x-repeating background, enabling as many stars as you want (or a big image with for example 5 different smilies one next to the other) without adding more elements or event handlers.
Based on the position of the mouse, or the selected value, a certain width is applied to the selection div or the hover div.
You might also like
Tags
accordion accordion menu animation navigation animation navigation menu carousel checkbox inputs css3 css3 menu css3 navigation date picker dialog drag drop drop down menu drop down navigation menu elastic navigation form form validation gallery glide navigation horizontal navigation menu hover effect image gallery image hover image lightbox image scroller image slideshow multi-level navigation menus rating select dependent select list slide image slider menu stylish form table tabs text effect text scroller tooltips tree menu vertical navigation menu

 Subscribe
 Follow Us
 14 years ago
 15370
15370 3486
3486


