Awesome Diapo slideshow with jQuery

Diapo slideshow is an open source project. You can suggest changes or improvements if you want. You can download it and use for free, you can also include it in your projects and sell it as part of a bigger work (in this case please consider a donation).
Diapo slideshow is tested on new browsers, but I tried to make it compatible with the old versions of Internet Explorer too (8 and 7). But I don't think I will spend many hours to improve this feature, sorry.
Diapo slideshow requires jQuery 1.4+ and other jQuery plugins are necessary if you want to use some functionalities: jQuery Easing (http://gsgd.co.uk/sandbox/jquery/easing/), jQuery HoverIntent (http://cherne.net/brian/resources/jquery.hoverIntent.html), jQuery Mobile (http://jquerymobile.com/)
Methods
| $('selector').diapo(); | basic format |
| $('selector').diapo({fx: 'scrollHorz', time: '5000'}); | an example with some customizations |
| $('selector').diapoStop(); | you can use this function to stop the slideshow |
| $('selector').diapoPlay(); | you can use this function to play/resume the slidesh |
Options
| selector: | 'div', [target element] |
| fx: | 'random', |
|
Available effects: 'random','simpleFade', 'curtainTopLeft', 'curtainTopRight', 'curtainBottomLeft', 'curtainBottomRight', 'curtainSliceLeft', 'curtainSliceRight', 'blindCurtainTopLeft', 'blindCurtainTopRight', 'blindCurtainBottomLeft', 'blindCurtainBottomRight', 'blindCurtainSliceBottom', 'blindCurtainSliceTop', 'stampede', 'mosaic', 'mosaicReverse', 'mosaicRandom', 'mosaicSpiral', 'mosaicSpiralReverse', 'topLeftBottomRight', 'bottomRightTopLeft', 'bottomLeftTopRight', 'bottomLeftTopRight' You can also use more than one effect: 'curtainTopLeft, mosaic, bottomLeftTopRight' |
|
| mobileFx: | '', [leave empty if you want to display the same effect on mobile devices and on desktop etc.] |
| slideOn: | 'random', [next, prev, random: decide if the transition effect will be applied to the current (prev) or the next slide] |
| gridDifference: | 250, [to make the grid blocks slower than the slices, this value must be smaller than transPeriod] |
| easing: | 'easeInOutExpo', [for the complete list http: jqueryui.com/demos/effect/easing.html] |
| mobileEasing: | '', [leave empty if you want to display the same easing on mobile devices and on desktop etc.] |
| loader: | 'pie', [pie, bar, none (even if you choose "pie", old browsers like IE8- can't display it... they will display always a loading bar)] |
| loaderOpacity: | .8, [0, .1, .2, .3, .4, .5, .6, .7, .8, .9, 1] |
| loaderColor: | '#ffff00', |
| loaderBgColor: | '#222222', |
| pieDiameter: | 50, |
| piePosition: | 'top:5px; right:5px', [this option accepts any CSS value] |
| pieStroke: | 8, |
| barPosition: | 'bottom', [bottom, top] |
| barStroke: | 5, |
| navigation: | true, [true, false. It enables the previous and the next buttons, their IDs are #pix_prev and #pix_next] |
| mobileNavigation: | true, [true, false. It enables the previous and the next buttons on mobile devices] |
| navigationHover: | true, [true, false. If true navigation will be visible only on hover state] |
| mobileNavHover: | true, [true, false. If true navigation will be visible only on hover state for mobile devices] |
| commands: | true, [true, false. It enables stop and play buttons] |
| mobileCommands: | true, [true, false. It enables stop and play buttons on mobile devices] |
| pagination: | true, [true, false. It enables the pagination numbers. Here below you can see the appended code] |
|
<div id="pix_pag"> <ul id="pix_pag_ul"> <li id="pag_nav_0"><span><span>0</span></span></li> <li id="pag_nav_1"><span><span>1</span></span></li> <li id="pag_nav_2"><span><span>2</span></span></li> ...etc. </ul> </div> |
|
| mobilePagination: | true, [true, false. It enables the pagination numbers on mobile devices] |
| thumbs: | true, [true, false. It shows the thumbnails (if available) when the mouse is on the pagination buttons. Not available for mobile devices] |
| hover: | true, [true, false. Puase on state hover. Not available for mobile devices] |
| pauseOnClick: | true, [true, false. It stops the slideshow when you click the sliders.] |
| rows: | 4, |
| cols: | 6, |
| slicedRows: | 8, [if 0 the same value of rows] |
| slicedCols: | 12, [if 0 the same value of cols] |
| time: | 3000, [milliseconds between the end of the sliding effect and the start of the nex one] |
| transPeriod: | 1500, [lenght of the sliding effect in milliseconds] |
| autoAdvance: | true, [true, false] |
| mobileAutoAdvance: | true, [true, false. Auto-advancing for mobile devices] |
| onStartLoading: | function() { }, |
| onLoaded: | function() { }, |
| onEnterSlide: | function() { }, |
| onStartTransition: | function() { } |
APIs
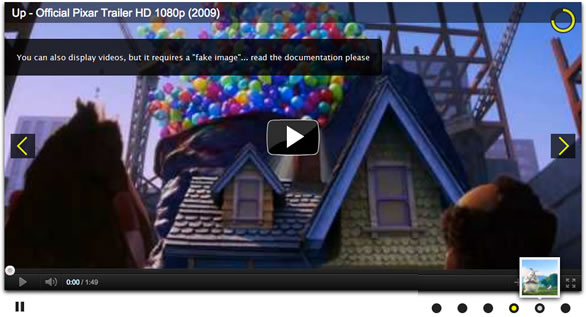
| 'data-fake' | a path to an image, [iframes (or objects) must be replaced by an image during the transition. Paste here the path to the image, for an example see here below] |
| <iframe width="940" height="470" src="http://www.youtube.com/embed/qas5lWp7_R0?wmode=transparent&autoplay=1" data-fake="images/slides/up-official-trailer-fake.jpg" frameborder="0" allowfullscreen></iframe> | |
| 'data-thumb' | a path to an image, [its size is set by default on 50x50 pixels. You can change it in the stylesheets. Use this attribute for the target element to set the thumbnail relative to the slide] |
| 'data-fx' | the same value as 'fx' option, [use this attribute for the target element to set the effect relative to a slide] |
| 'data-mobileFx' | the same value as here above, but for mobile devices |
| 'data-slideOn' | next or prev, [use this attribute for the target element to set if apply the transition effect to the previous or the next element relative to the slide] |
| 'data-slideOn' | next or prev, [use this attribute for the target element to set if apply the transition effect to the previous or the next element relative to the slide] |
| 'data-time' | in milliseconds, [use this attribute for the target element to set for a slide the time between one transition the and the next one] |
| 'data-easing' | the same value as 'easing' option, [use this attribute for the target element to set the easing effect for a slide] |
| '.fromLeft' | add this class to an element (with position:absolute) you want to appear from the left after the transition effect has terminated* |
| '.fromRight' | add this class to an element (with position:absolute) you want to appear from the right after the transition effect has terminated* |
| '.fromTop' | add this class to an element (with position:absolute) you want to appear from the top after the transition effect has terminated* |
| '.fromBottom' | add this class to an element (with position:absolute) you want to appear from the bottom after the transition effect has terminated* |
| '.fadeIn' | add this class to an element (with position:absolute) you want to appear fade in after the transition effect has terminated* |
| (*)all these elements are display not at the same time, but consecutively5080 |
The article sourc:http://www.pixedelic.com/plugins/diapo/
You might also like
Tags
accordion accordion menu animation navigation animation navigation menu carousel checkbox inputs css3 css3 menu css3 navigation date picker dialog drag drop drop down menu drop down navigation menu elastic navigation form form validation gallery glide navigation horizontal navigation menu hover effect image gallery image hover image lightbox image scroller image slideshow multi-level navigation menus rating select dependent select list slide image slider menu stylish form table tabs text effect text scroller tooltips tree menu vertical navigation menu

 Subscribe
 Follow Us
 13 years ago
 36407
36407 9780
9780


