a Nice, Lightweight JavaScript Tooltip
 14 years ago
  6260
6260  1395
1395
 n/a
n/a

Introduction
To begin, create the 3 files needed for this tutorial (index.html, style.css and script.js) and include the stylesheet and the script from index.html.
The most important things to remember when writing JavaScript are to keep the code simple and to script logically. The first thing that needs to be established is precisely what you would like the script to accomplish. Based on the desired functionality it then helps to create a diagram or flow description for any complex script before you get into the code. Doing so can help streamline the logic and keep the script clean.
What we are trying to accomplish…
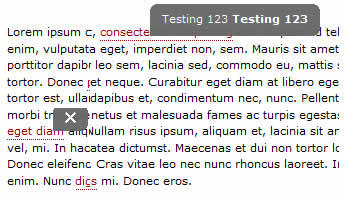
Create a lightweight script that fades a tooltip with rounded corners in relation to the cursor position.
How does the script need to flow…
- Setup the namespace and global variables.
- Create a function to display the tooltip that takes two variables, the string to display and an optional width integer.
- When the function is called build the tooltip markup if it does not exist and register an onmousemove listener to position the tooltip. Insert the tooltip content into the tooltip and call a function to incrementally fade the tooltip to the target opacity.
- On the mouseout event of a “hotspot” reference a function that calls the fade function to incrementally hide the tooltip.
Let’s begin by setting up the JavaScript file. We want to create a namespace to encapsulate the functionality of our script. By doing so, we virtually eliminate the possibility of a conflict with some other script or framework.
var tooltip(){
 return{};
}();
Next, we need to add any variables we want to include on the global level of the namespace. By setting these variables globally we can access them in any of the child functions and quickly change them without sorting through the code.
id(string) – id of the tooltiptop(integer) – number of pixels to offset the tooltip from the top of the cursorleft(integer) – offset to the right of the cursormaxw(integer) – maximum width in pixels of the tooltipspeed(integer) – value to increment the tooltip opacity during transitiontimer(integer) – represents the speed at which the fade function in performedendalpha(integer) – target opacity of the tooltipalpha(integer) – current alpha of the tooltiptt,t,c,b,h– these represent global variables to be set laterie(boolean) – global variable based on browser vendor
var id = 'tt';
 var top = 3;
 var left = 3;
 var maxw = 300;
 var speed = 10;
 var timer = 20;
 var endalpha = 95;
 var alpha = 0;
 var tt,t,c,b,h;
 var ie = document.all ? true : false;
We need to determine how we want the tooltip to look so we can figure out how to build out the elements to add to the DOM… a rectangle with rounded corners on the top and right corners only. To accomplish this we need a wrapper div and then three nested divs. We can style the divs with the CSS. The markup should look something like this once generated.
<div id="tt">
 <div id="tttop"> </div>
 <div id="ttcont"> </div>
 <div id="ttbot"> </div>
</div>
The first function we will name ‘show’ and it will be accessible by calling tooltip.show(). It will need to take two parameters… the content string and an optional width integer. To begin, it will need to check and see if the tooltip has been added to the DOM yet. If it does not exist the divs need to be built and added to the body. Either way the innerHTML of the contentdiv will need to be set to the content parameter, the height and width set and the fade function set to a timer.
show:function(v,w){
if(tt == null){
 tt  = document.createElement('div');
 tt.setAttribute('id',id);
 t  = document.createElement('div');
 t.setAttribute('id',id  + 'top');
 c  = document.createElement('div');
 c.setAttribute('id',id  + 'cont');
 b  = document.createElement('div');
 b.setAttribute('id',id  + 'bot');
 tt.appendChild(t);
 tt.appendChild(c);
 tt.appendChild(b);
 document.body.appendChild(tt);
 tt.style.opacity  = 0;
 tt.style.filter  = 'alpha(opacity=0)';
 document.onmousemove  = this.pos;
}
tt.style.display  = 'block';
c[removed] =  v;
tt.style.width  = w ? w + 'px' : 'auto';

if(!w  && ie){
 t.style.display  = 'none';
 b.style.display  = 'none';
 tt.style.width  = tt.offsetWidth;
 t.style.display  = 'block';
 b.style.display  = 'block';
}

if(tt.offsetWidth  > maxw){tt.style.width = maxw + 'px'}

h =  parseInt(tt.offsetHeight) + top;
clearInterval(tt.timer);
tt.timer =  setInterval(function(){tooltip.fade(1)},timer);
},
The next function we need is the position function that will set the top and left values of the tooltip as the cursor moves. First we calculate the position based on the browser and then we set the values taking into consideration the global offset variables.
pos:function(e){
 var u = ie ? event.clientY + document.documentElement.scrollTop : e.pageY;
 var l = ie ? event.clientX + document.documentElement.scrollLeft : e.pageX;
 tt.style.top = (u - height) + 'px';
 tt.style.left = (l + left) + 'px';
},
Next we need to create a function that will fade the tooltip from its current opacity to the target opacity based on the direction variable that is passed to it.
fade:function(d){
 var a = alpha;
 if((a !=  endalpha && d == 1) || (a != 0 && d == -1)){
   var  i = speed;
   if(endalpha  - a < speed && d == 1){
      i  = endalpha - a;
   } else  if(alpha < speed && d == -1){
      i  = a;
  }
  alpha  = a + (i * d);
  tt.style.opacity  = alpha * .01;
  tt.style.filter  = 'alpha(opacity=' + alpha + ')';
   }else{
     clearInterval(tt.timer);
     if(d  == -1){
     tt.style.display  = 'none';
  }
 }
},
Finally the function to hide the tooltip onmouseout.
hide:function(){
 clearInterval(tt.timer);
 tt.timer = setInterval(function(){tooltip.fade(-1)},timer);
}
Here is the full script
var tooltip=function(){
 var id = 'tt';
 var top = 3;
 var left = 3;
 var maxw = 300;
 var speed = 10;
 var timer = 20;
 var endalpha = 95;
 var alpha = 0;
 var tt,t,c,b,h;
 var ie = document.all ? true : false;
 return{
  show:function(v,w){
   if(tt == null){
    tt = document.createElement('div');
    tt.setAttribute('id',id);
    t = document.createElement('div');
    t.setAttribute('id',id + 'top');
    c = document.createElement('div');
    c.setAttribute('id',id + 'cont');
    b = document.createElement('div');
    b.setAttribute('id',id + 'bot');
    tt.appendChild(t);
    tt.appendChild(c);
    tt.appendChild(b);
    document.body.appendChild(tt);
    tt.style.opacity = 0;
    tt.style.filter = 'alpha(opacity=0)';
    document.onmousemove = this.pos;
   }
   tt.style.display = 'block';
   c[removed] = v;
   tt.style.width = w ? w + 'px' : 'auto';
   if(!w && ie){
    t.style.display = 'none';
    b.style.display = 'none';
    tt.style.width = tt.offsetWidth;
    t.style.display = 'block';
    b.style.display = 'block';
   }
  if(tt.offsetWidth > maxw){tt.style.width = maxw + 'px'}
  h = parseInt(tt.offsetHeight) + top;
  clearInterval(tt.timer);
  tt.timer = setInterval(function(){tooltip.fade(1)},timer);
  },
  pos:function(e){
   var u = ie ? event.clientY + document.documentElement.scrollTop : e.pageY;
   var l = ie ? event.clientX + document.documentElement.scrollLeft : e.pageX;
   tt.style.top = (u - h) + 'px';
   tt.style.left = (l + left) + 'px';
  },
  fade:function(d){
   var a = alpha;
   if((a != endalpha && d == 1) || (a != 0 && d == -1)){
    var i = speed;
   if(endalpha - a < speed && d == 1){
    i = endalpha - a;
   }else if(alpha < speed && d == -1){
     i = a;
   }
   alpha = a + (i * d);
   tt.style.opacity = alpha * .01;
   tt.style.filter = 'alpha(opacity=' + alpha + ')';
  }else{
    clearInterval(tt.timer);
     if(d == -1){tt.style.display = 'none'}
  }
 },
 hide:function(){
  clearInterval(tt.timer);
   tt.timer = setInterval(function(){tooltip.fade(-1)},timer);
  }
 };
}();
Now on to the CSS for the tooltip which is completely customizable to match any interface.
#tt {
 position:absolute;
 display:block;
 background:url(images/tt_left.gif) top left no-repeat;
 }
 #tttop {
 display:block;
 height:5px;
 margin-left:5px;
 background:url(images/tt_top.gif) top right no-repeat;
 overflow:hidden;
 }
 #ttcont {
 display:block;
 padding:2px 12px 3px 7px;
 margin-left:5px;
 background:#666;
 color:#fff;
 }
#ttbot {
display:block;
height:5px;
margin-left:5px;
background:url(images/tt_bottom.gif) top right no-repeat;
overflow:hidden;
}
To build and hide a tooltip call the script as below. The second parameter in the show function is optional, if not passed the width will automatically adjust to the content within the maxh limit.
You might also like
Tags
accordion accordion menu animation navigation animation navigation menu carousel checkbox inputs css3 css3 menu css3 navigation date picker dialog drag drop drop down menu drop down navigation menu elastic navigation form form validation gallery glide navigation horizontal navigation menu hover effect image gallery image hover image lightbox image scroller image slideshow multi-level navigation menus rating select dependent select list slide image slider menu stylish form table tabs text effect text scroller tooltips tree menu vertical navigation menu

 Subscribe
 Follow Us


