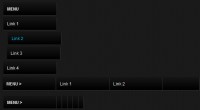
we are going to create an extraordinary gallery with scrollable thumbnails that slide out from a navigation. We are going to use jQuery and some CSS3 properties for the style. The main idea is to have a menu of albums where each item will reveal a horizontal bar with thumbnails when clicked. The thumbnails container will scroll automatically when the user moves the mouse to the left or right.
When a thumbnail is clicked it will be loaded as a full image preview in the background of the page. We will also have a text container for one of the menu items.
The Markup
Our HTML is mainly going to consist of a wrapper and the menu list. We will have some other elements, like the full image, the loading div and the halftone overlay. First, let’s create the wrapper:
<div id="st_main" class="st_main"> |
Inside of our wrapper we will add the following:
<img src="images/album/1.jpg" alt="" class="st_preview" style="display:none;"/> |
<div class="st_overlay"></div> |
<div id="st_loading" class="st_loading"> |
The first element is our full preview image. The overlay is going to be a fixed div which will stretch over the whole screen repeating a halftone pattern to create a fancy overlay effect on the image. We also add a title and a loading div.
We then add an unordered list where each li element is going to contain a span for its title and the thumbnails wrapper. The last li element is going to contain some wrapper for text, that’s why we will not give it the class “album”. Later, in the jQuery function we will need to distinguish that.
<ul id="st_nav" class="st_navigation"> |
<span class="st_arrow_down"></span> |
<div class="st_wrapper st_thumbs_wrapper"> |
<img src="images/album/thumbs/1.jpg" alt="images/album/1.jpg"/> |
<img src="images/album/thumbs/2.jpg" alt="images/album/2.jpg"/> |
<span class="st_arrow_down"></span> |
<div class="st_about st_thumbs_wrapper"> |
<div class="st_subcontent"> |
The thumbnail images get the alt value of the path to the full size image. That might not be the proper use of the alt attribute, but it’s just so convenient for our functionality that we will use it this way.
Let’s take a look at the style.
The CSS
First, let’s reset the paddings and margins for all elements and define the general styles:
font-family:"Myriad Pro","Trebuchet MS", Helvetica, sans-serif; |
Making the body overflow hidden we avoid any scroll bar appearing, but you can adapt that to your needs. I.e. if it is important that the full sized image is completely viewable by the user, you might want to remove the overflow:hidden property.
Next, we will define the style for the full size image, the overlay and the loading div:
background:transparent url(../images/pattern.png) repeat-x bottom left; |
background:#000 url(../images/icons/loader.gif) no-repeat 10px 50%; |
padding:15px 40px 15px 60px; |
-moz-box-shadow:0px 0px 2px #000; |
-webkit-box-shadow:0px 0px 2px #000; |
box-shadow:0px 0px 2px #000; |
By setting the image width to be always 100%, we make sure that it occupies all the horizontal space on the page. For very large screens the image might look pixelated which can, of course, be avoided by using gigantic images. In our demo we use a maximum width of 1600 pixel to make the loading time bearable. The halftone pattern on top of the image helps a little to disguise a pixelated effect.
Please note that whenever opacity is used, the IE filter property needs to be used if you want to achieve semi-transparent effects in IE. The overlay looks like crap if you use the filter property, though. Check out the ZIP file, I added the IE DXImageTransform filter to the respective styles.
The navigation will be positioned absolutely:
The initial left value is set to -300 pixel because we want to slide it in only after our full image is loaded. If you use longer titles in the list items, you might need to adapt this value.
Our list elements are going to have the following style:
The span for the title will be styled as follows:
ul.st_navigation li span.st_link{ |
-moz-box-shadow:0px 0px 2px #000; |
-webkit-box-shadow:0px 0px 2px #000; |
box-shadow:0px 0px 2px #000; |
Next, we define the style for the spans with the up/down arrow for opening and closing the thumbnail container:
ul.st_navigation li span.st_arrow_down, |
ul.st_navigation li span.st_arrow_up{ |
-moz-box-shadow:0px 0px 2px #000; |
-webkit-box-shadow:0px 0px 2px #000; |
box-shadow:0px 0px 2px #000; |
ul.st_navigation li span.st_arrow_down{ |
background:#000 url(../images/icons/down.png) no-repeat center center; |
ul.st_navigation li span.st_arrow_up{ |
background:#000 url(../images/icons/up.png) no-repeat center center; |
The wrapper for the thumbnail container will be positioned absolutely and we want to hide any vertical overflow:
Although the thumbs are only 120 pixels high, we want to leave some space so that the box shadow of the images inside will not be cut away.
The thumbnails container will simply be styled as follows:
The thumbnails will have a neat box shadow and some spacing:
-moz-box-shadow:1px 1px 5px #000; |
-webkit-box-shadow:1px 1px 5px #000; |
box-shadow:1px 1px 5px #000; |
The st_about class is the wrapper class for the text container:
And, finally the text container itself:
-moz-box-shadow:0px 0px 10px #000; |
-webkit-box-shadow:0px 0px 10px #000; |
box-shadow:0px 0px 10px #000; |
And that’s all the style! Let’s make some magic!
The JavaScript
In our jQuery function we will first define some variables:
var $loader = $('#st_loading'); |
var $list = $('#st_nav'); |
var $currImage = $('#st_main').children('img:first'); |
The first thing that we want to do is to load the current full size image. After it’s loaded, we want the navigation to appear:
$('<img>').load(function(){ |
$list.animate({'left':'0px'},500); |
}).attr('src',$currImage.attr('src')); |
The buildThumbs() function calculates the widths of all the thumbnail containers. We need that value for the automatic scrolling function later on:
$list.children('li.album').each(function(){ |
var $thumbs_wrapper = $elem.find('.st_thumbs_wrapper'); |
var $thumbs = $thumbs_wrapper.children(':first'); |
var finalW = $thumbs.find('img').length * 183; |
$thumbs.css('width',finalW + 'px'); |
makeScrollable($thumbs_wrapper,$thumbs); |
Next, we define the behavior of clicking on the arrows. If it’s down, we will expand the thumbnail container and hide any other. If it’s up, we will make the current container hide again.
$list.find('.st_arrow_down').live('click',function(){ |
$this.addClass('st_arrow_up').removeClass('st_arrow_down'); |
var $elem = $this.closest('li'); |
$elem.addClass('current').animate({'height':'170px'},200); |
var $thumbs_wrapper = $this.parent().next(); |
$thumbs_wrapper.show(200); |
$list.find('.st_arrow_up').live('click',function(){ |
$this.addClass('st_arrow_down').removeClass('st_arrow_up'); |
Before we define the hideThumbs() function, we specify what happens when clicking on a thumb. The full size image will show and while it’s loading we will make the loading div appear. Then we animate the opacity and fade the image in:
$list.find('.st_thumbs img').bind('click',function(){ |
$('<img class="st_preview"/>').load(function(){ |
var $currImage = $('#st_main').children('img:first'); |
$this.insertBefore($currImage); |
$currImage.fadeOut(2000,function(){ |
}).attr('src',$this.attr('alt')); |
}).bind('mouseenter',function(){ |
$(this).stop().animate({'opacity':'1'}); |
}).bind('mouseleave',function(){ |
$(this).stop().animate({'opacity':'0.7'}); |
The function to hide the thumbnails looks as follows:
.animate({'height':'50px'},400,function(){ |
$(this).removeClass('current'); |
.find('.st_thumbs_wrapper') |
.addClass('st_arrow_down') |
.removeClass('st_arrow_up'); |
We animate the height of the li and make the thumbnails container disappear like that. We also need to set the class for the arrow span correctly.
And finally, we will define the makeScrollable() function that automatically scrolls the thumbnails div horizontally on mouse move:
function makeScrollable($outer, $inner){ |
var divWidth = $outer.width(); |
var lastElem = $inner.find('img:last'); |
$outer.unbind('mousemove').bind('mousemove',function(e){ |
var containerWidth = lastElem[0].offsetLeft + lastElem.outerWidth() + 2*extra; |
var left = (e.pageX - $outer.offset().left) * (containerWidth-divWidth) / divWidth - extra; |
For cufonizing the titles and adding some decent shadow, we will include the following into the head of our html document:
<script src="js/cufon-yui.js" type="text/javascript"></script> |
<script src="js/Quicksand_Book_400.font.js" type="text/javascript"></script> |
<script type="text/javascript"> |
Cufon.replace('span,p,h1',{ |
textShadow: '0px 0px 1px #ffffff' |
And that’s it! We hope you enjoyed the tutorial and find it useful!


 Subscribe
 Follow Us
 14 years ago
 28301
28301 4636
4636


