Simplest jQuery Spotlight Effect
 14 years ago
  10181
10181  1584
1584
 n/a
n/a

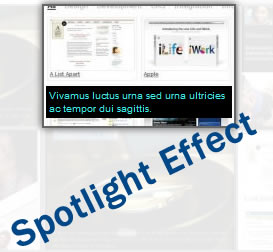
This is a Simplest jQuery Spotlight Effect
1. HTML
We will use divs instead of ul list here. I have tested it with UL before, and it will work perfectly fine, you just have to style is with CSS. The caption for the thumbnail will be obtained by jQuery from the anchor Title.
<div id="items">
 <a class="item" href="#" title="Vivamus luctus urna sed urna ultricies ac tempor dui sagittis.">
  <img src="dummy.gif" width="190" height="120"/>
 </a>
 <a class="item" href="#" title="Vivamus luctus urna sed urna ultricies ac tempor dui sagittis.">
  <img src="dummy.gif" width="190" height="120"/>
 </a>
 <a class="item" href="#" title="Vivamus luctus urna sed urna ultricies ac tempor dui sagittis.">
  <img src="dummy.gif" width="190" height="120"/>
 </a>
 <a class="item" href="#" title="Vivamus luctus urna sed urna ultricies ac tempor dui sagittis.">
  <img src="dummy.gif" width="190" height="120"/>
 </a>
</div>
<div class="clear"></div>
2. CSS
CSS is pretty simple, if you're using different image size, you might need to adjust the position of caption. Also, we are using a little bit of CSS3 here, we're using drop shadow, so when you mouse over the item, you will able to see them in firefox, chrome and safari, maybe opera but definitely not internet explorer.
body {
 font-family:arial;
 margin-top:70px;
}

img {border:none;}

#items a {
 text-decoration:none;
 color:#3deeee;
}

#items {
 width:786px;
 margin:0 auto;
}

#items .item {
 display:block;
 width:190px;
 height:120px;
 border:2px solid #666;
 float:left;
 position:relative;
}

#items .item .caption {
 position:absolute;
 top:80px;
 left:2px;
 padding:3px;
 font-size:10px;
 width:180px;
 display:none;
 background:#000;
}

.clear {
 clear:both;
}

.effect {
 /* CSS3 shadow */
 box-shadow: 0 0 10px #444;
 -moz-box-shadow: 0 0 10px #444;
 -webkit-box-shadow: 0 0 10px #444;
}
3. Javascript
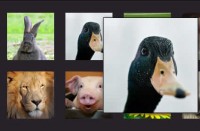
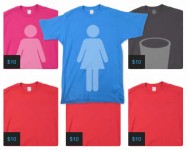
ALright, here we come to the script that makes everything alive. The way it works is really simple, when we mouse over the item inside the #items, it will set the opacity of the siblings of the item to 0.1, add drop shadow effect and then display the caption. If the user left the #items block, everything is reset back to default
 $(document).ready(function () {

  //loop through all the children in #items
  //save title value to a span and then remove the value of the title to avoid tooltips
  $('#items .item').each(function () {
   title = $(this).attr('title');
   $(this).append('<span class="caption">' + title + '</span>');
   $(this).attr('title','');
  });

  $('#items .item').hover(
   function () {
    //set the opacity of all siblings
    $(this).siblings().css({'opacity': '0.1'});

    //set the opacity of current item to full, and add the effect class
    $(this).css({'opacity': '1.0'}).addClass('effect');

    //show the caption
    $(this).children('.caption').show();
   },
   function () {
    //hide the caption
    $(this).children('.caption').hide();
   }
  );

  $('#items').mouseleave(function () {
   //reset all the opacity to full and remove effect class
   $(this).children().fadeTo('100', '1.0').removeClass('effect');
  });

 });
You might also like
Tags
accordion accordion menu animation navigation animation navigation menu carousel checkbox inputs css3 css3 menu css3 navigation date picker dialog drag drop drop down menu drop down navigation menu elastic navigation form form validation gallery glide navigation horizontal navigation menu hover effect image gallery image hover image lightbox image scroller image slideshow multi-level navigation menus rating select dependent select list slide image slider menu stylish form table tabs text effect text scroller tooltips tree menu vertical navigation menu

 Subscribe
 Follow Us


